published: Saturday 21 August 2021
modified: Sunday 22 August 2021
author: Hales
markup: textile
Adventures using and repairing an X131e laptop from 2011
As usual: prettiest picture is at the very bottom of the article.
This article covers several repairs, one including reverse engineering the BIOS to allow replacement parts. Feel free to scroll down and skip to this content.
I few years ago I was using a Dell 3160 11.6" laptop (left), it had a pile of annoying issues including phantom stuck keys whilst typing. I bought myself a Lenovo x260 thinkpad (right) second hand for about $200AUD:

Alas we're going to completely ignore that x260. I ended up giving it to my brother (and he reports he is still very happy using it).
Then my Dell died and COVID hit worldwide. Suddenly second hand x260's were $650 on eBay, not $200.
:|
That's a lot of timtams.
I tried to repair my Dell -- it's screen backlight was not turning on -- it looked like a screen cable failure (already replaced once) or mainboard issue (gah!). After ordering the wrong screen cable I got angry and decided I needed a working laptop quickly, work was getting hard without one.
I needed something small and with an ethernet port. Both of these features are fashion faux pas these days. My choices were limited so I had to dig further back in time than I was comfortable with.
Enter the Thinkpad x131e from 2011/2012, a special education model given to high school students under Kevin Rudd's Year-9 laptop program:
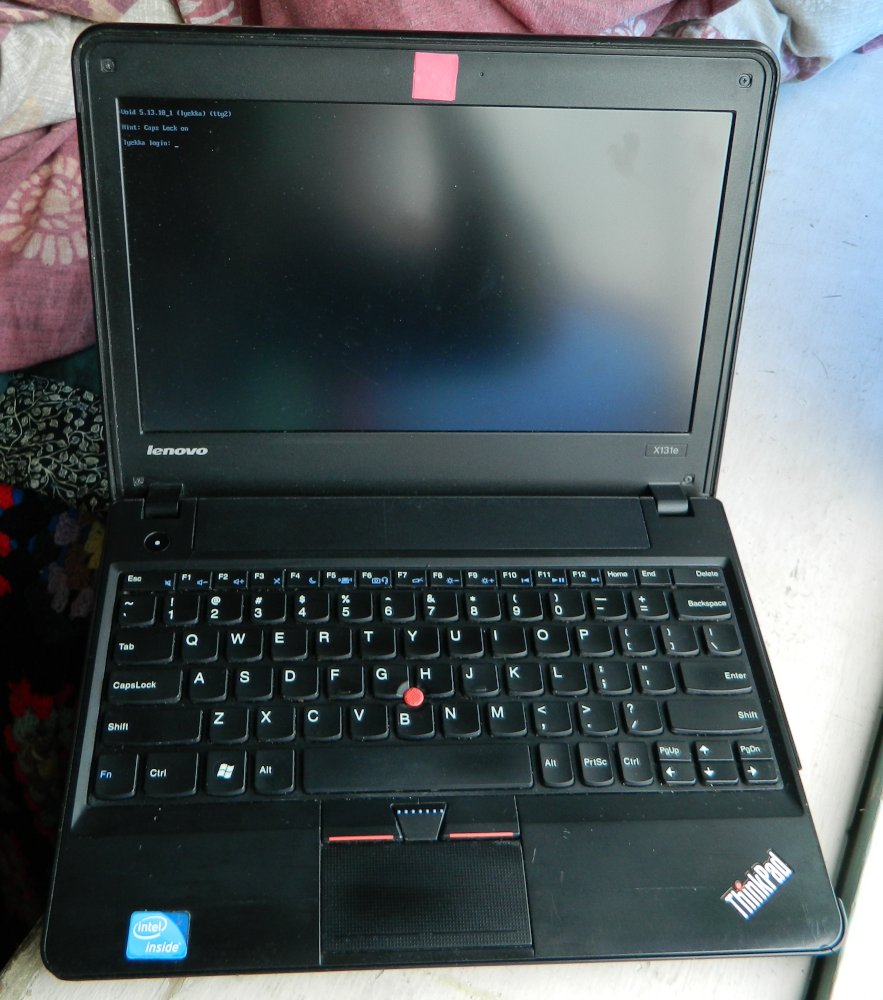
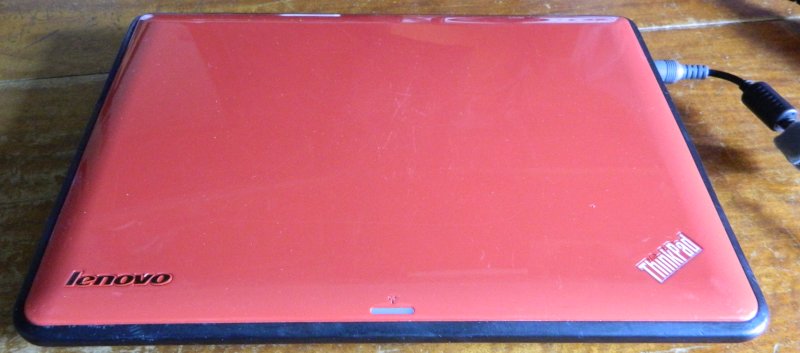
$120 from the shadiest looking computer store in Kogarah. Totally worth every dollar, it has been serving me well for more than a year now. Bonus is that it is red.
It's a chonky boy at about 1.9 18650s (that's 34mm in metric).

For (not in scale with above) comparison: here is a stack of other 11.6" laptops in my house. Top to bottom: DELL 3160, Thinkpad x100e, Acer R3-131T. Notice the clever pschology of tapering the edges to make the laptops look slimmer.

This x131e laptops huffs and it puffs. Literally, the fan control algorithms are very annoying. I really miss my passive cooled laptops, but overall this replacement one has had less problems; or more accurately I've been able to fix its problems better :)
BIOS bootsplash:

"Laptop trackable, monitored and identfiable by police. If found please return to your nearest NSW Public High School or call 1800 338 488 to arrange its return". They really should have added a "don't bother if it's 10 years down the track" clause to the engraving on the rear cover, these were all given to the students after they graduated anyway.
I'll stop stalling, let's get on with the open heart surgery.
Wifi repair saga
Bad card?
The unit came with a Broadcom wifi card that needed some fiddly drivers on Linux, but it worked. Initially.
Over a few weeks: wifi started becoming less reliable. I couldn't use it in the backyard any more, it kept disconnecting and dropping lots of packets. Over time it got to the point where where I had to stand within a few meters of my access point for it to work at all >:|
Luckily I had a similar model Broadcom card at hand and swapping it fixed my problems.
Bad card again?
Hmm, my wifi was getting worse over time again. How could this card be dying like the old one?
Then it hit me: wiggling the screen on its hinges would sometimes restore the wifi performance. Knocking the lid could take it offline again. Oh dear.
I tried switching the wifi card over to using the long-range broadband (3G/4G/LTE) antennas but I think this was a mistake, causing even more damage to the cards. These antennas are tuned to a completely different frequency range to wifi antennas.
Coax swap
Time to change the coax cables that go through the screen hinges and up to the wifi antennas. These have UFL connectors on one end to plugin to the wifi card and on the other end are soldered onto the antennas at the top of the screen.
The easiest way to change these is to replace the entire cable + antenna combo as one unit. I used a spare set I had taken out of a different model of laptop (it looks like the coax lengths might be standardised, it was almost a perfect fit).
You of course have to completely disassemble the laptop, including the motherboard, just to re-snake these cables:

Old antennas are black things at the top (combined wifi + mobile broadband):
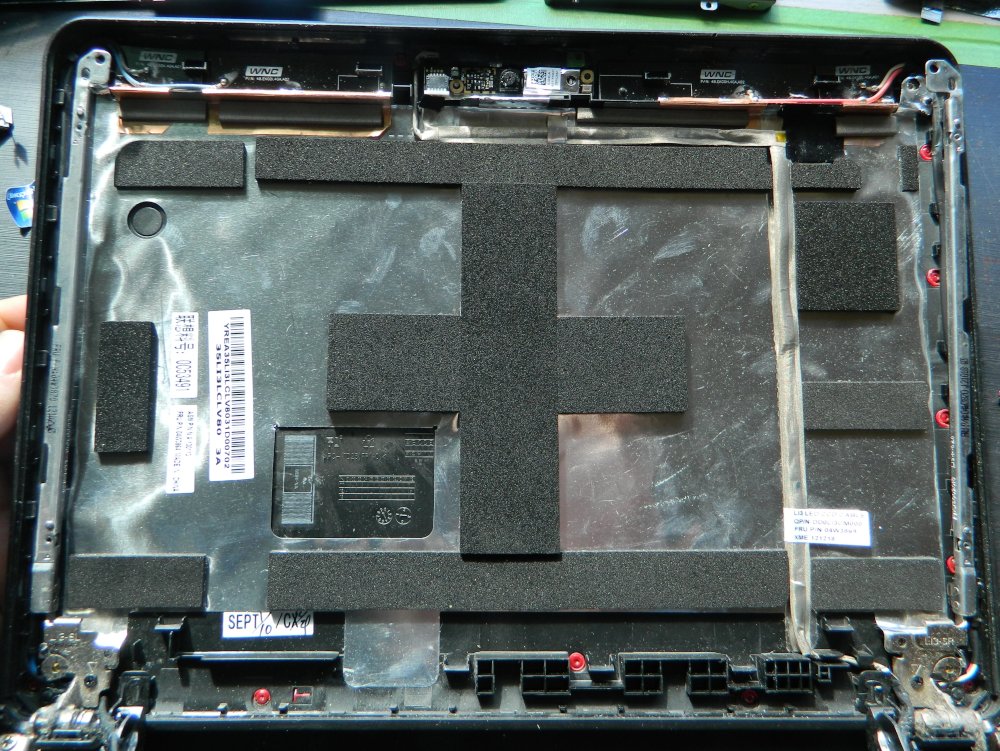
New antennas are smaller bent-metal structures (wifi only):

This repair has been reliable and effective.
Technically: changing the antennas will change the radiation patterns too, however I suspect peak measurements will only be off by a few dB and it is highly unlikely the laptop is now a source of notable interference or disturbance to other wifi users. This is not like using high gain directional wifi antennas which definitely cause problems for your neighbours if used incorrectly (don't strap these to your laptop!).
Cards still bad?
Wifi performance was dramatically better after the coax swap (and jiggling the screen no longer had an effect on performance), however it was still poor overall. I tried swapping the wifi card back to the original and noted that it was even worse.
I suspected that my two wifi cards were now damaged. Running them with the damaged coax probably caused intermittent signal reflections at full power. This is known to damage (some?) wifi cards. I have seen wifi routers with warning labels about not running them with the antennas removed for this very reason.
All was going to be OK! I realised that I had a nice (and much newer) Intel mPCIE wifi card that I could use. Intel wifi cards are generally better quality and have better driver support. I swapped it in assuming that it would surely fix all of my remaining wifi problems.
Lol no

Wow.
I've heard stories about laptop companies blocking non-stock wifi cards. Apparently this is because they worry that changing the wifi card will invalidate RF emissions tests for the whole laptop, but I think this is garbage:
- Lots of other laptop makers let you change wifi cards and have done so for decades.
- An end-user changing their wifi card has no effect on Lenovo. It's no chip off their shoulder. If someone replaces parts in their Toyota and crashes it because of their poor part choice then Toyota does not get blamed.
I think I might know the real reason:

This table is from the Thinkpax X131e Product Specifications Reference (PSREF).
I don't have the actual prices but it's safe to assume that units with better wifi cards would have cost more. Depending on how they structured their pricing: it may have been been cheaper to get the lower-end units and install your own wifi cards rather than buy the higher-specced ones from the factory. By blocking owners from using 3rd-party parts the laptop manufacturer can squeeze more money out of customers, but in doing so also deprives the customer of traditional upgrade rights and repair rights.
This left me with three pathways:
- Throw away the entire laptop as e-waste because repairs have been blocked by the manufacturer.
- Buy another period Broadcom wifi card and install that
- Modify the system to accept other wifi cards
Option (1) is wasteful and stupid.
Option (2) is what I would call an "inappropriate repair". We know that the cards are delicate and do not perform well. This would be like a mechanic recommending you install another factory-original diff on your car after the first two died early due to weaknesses/flaws in their design.
Option (3) is what I call an "appropriate repair". Replace the problematic part with something that is of better quality so the fault does not keep re-occuring and the repaired value of the device is not diminished. This is a car mechanic recommending an aftermarket diff that is about the same price (or cheaper) and doesn't have the fatal flaws of the factory original part. It would be a scam for the mechanic not to recommend this pathway.
Wifi card whitelisting is in effect an anti-repair feature regardless of what the manufacturer intends. I was furious.
Mere bytes on a device I own are stopping me from repairing it
I had never modified a BIOS before so this was a steep learning curve. For this article I'm conflating BIOS and UEFI for which I provide zero apologies.
Getting the BIOS in and out
BIOSs are almost always stored on a little 8-pin SOIC flash chip on your motherboard. These are surprisingly standardised and can be read or programmed in-situ using a SOIC clip and programmer. Here I was using a cheap CH340 programmer and a cheap SOIC8 clip off eBay (less than $10AUD combined):

My cheap programmer took about a minute to program & verify (faster alternatives are available) and the SOIC clip is not perfect, sometimes losing contact.
I used flashrom to operate my programmer. It's a great little utility. You can sometimes even flash your own BIOS on a running system but that leaves you no recovery options when you make mistakes, so an external programmer (like above) is effectively mandatory.
To reverse engineer and modify your BIOS: you need a "real" copy of it pulled off an actual chip. BIOS updates and other BIOS files downloaded from the manufacturer are not in a final/usable form, they're typically re-arranged and compressed. Don't waste your time with them, get a real and working copy off your device's flash chip instead.
My X131e had two SOIC8 flash chips. One for BIOS, the other likely for the onboard system microcontroller. I ignored the latter once I worked out which was which. I've read somewhere that you are supposed to update both of these in a certain order.
You need to keep a backup of your BIOS! Many of the changes I tested broke boot, reverting my changes was as easy as flashing the original back BIOS on.
Reverse engineering the BIOS
Modern UEFIey-thingy BIOSs (read: BIOS wasn't complicated enough so we added more comittees) are lots of individual chunks of code called "EFI Apps" smooshed together. UEFItool is your friend in extracting each of these and then also putting your modified chunks back in.
Note: I had to build UEFItool from source to get the modification/editing functionality to even show up in the menus, at the time these features were disabled & invisible in normal release builds. I was very confused until I found this out.
I found which chunk of the UEFI I needed to work on by searching for the string "Unauthorized network card". This is the LenovoWmaPolicy chunk.

To reverse engineer the BIOS I used Ghidra. It's a brilliant tool that even tries to make up equivalent C code to match the assembly it decodes. There are lots of screenshots of it below. Unfortunately there were no function names stored in my BIOS (I believe these are called 'debug symbols'?) so I had to guess and work these out on my own.
I found a few really useful writeups on the web by people performing similiar BIOS mod work.
ps0358 has published a complete guide to removing wifi whitelisting on a lenovo laptop, my BIOS was somewhat similar.
erfur's Analysing an EFI Application with Radare2 was brilliant even though I didn't use radare2. Finding the standard string functions was a great suggestion to start me out:


I was not very familiar with x86 assembly yet I still managed to work out quite a few other functions on my own:

It took me many days of trial and error, with lots of repeated BIOS flashing & boot tests. I slowly got closer and closer:

One annoyance with Ghidra was that it was sometimes blind to things it had already found. It would list some function arguments as variables/registers declared at the start of a function rather than as actual function arguments. Manually fixing each of these dramatically cleaned up a lot of assembly, especially just before function calls. Here is an example, note the pile of local "variables" at the top of the function:

Changing the hard-coded MAC addresses didn't seem to work for me and they seemed to be stored in various different ways in different places.
Eventually I found a single function that was the wifi whitelist check:

Simply modifying its bytecode to RET immediately (essentially making the function do nothing) was enough to disable the wifi whitelist. My laptop booted and the wifi worked. This was absolutely elating, especially after many days of work banging my head against the assembly.
This final fix required modifying only two bytes of the BIOS to disable the wifi card whitelist:

Wifi was now back to 100% performance again.
I was over the moon. I had performed open heart surgery on my almost 10 year old laptop and won, saving it from e-waste and giving me a working device once again.
That was until I discovered the wifi broke after suspend.
Pestis cruento marana computatis
Yep.
The wifi worked from cold boot. If you suspended and resumed: the card would be disabled. The 'rfkill' utility reported that the card was "hard-blocked", ie not something that can be fixed in software.
Down the rabbit-hole of hard-blocking wifi cards
Long story short: it turns out to be the fault of changing mPCIe standards
Pin 20 used to be "undefined" then later on it was changed to "disable this card if high". My laptop was setting this pin after resume for some reason.
Initially I covered the pin on my wifi card with tape:

Don't stare directly at the fuzzy dust
This worked for a while, but the little metal fingers in the socket would slowly cut through the tape and contact the pad again. This kind of makes sense: these fingers were designed to cut through debris & grease to ensure a permanent and reliable electrical connection with the pads on the card.
Eventually I just cut the pin off the socket instead:

Wifi has never had a problem ever since (it's been more than a year now). This saga was finally at its end.
Proprietary charger plug
The charger has 3 wires: +, - and sense. The sensing protocol is very simple: a resistor tells the laptop how much current/power the charger can deliver. That's it. This compares favourably to my Dell that required digital comms back and forth before it would start charging.
Knowing this helped me out in a pinch when I had left my charger at work one weekend. I was able to charge my laptop using nothing more than another 20V laptop charger, aluminium flashing, thin double-sided tape, a nail as a center pin, some hand-mouldable plastic and a 10K resistor:


:D
The center pin is the sense line. The main + and - are the inside and outside of the metal barrel. I insulated these two layers from each other using the double-sided tape (squint to see it).
Needless to say: not to be used without supervision! My plug was actually a bit too small, so at one point it had poor contact and heated up slightly, melting the white plastic plug at the rear. Nothing some wiggling and a computer fan didn't fix >:E
If I ever design a laptop it's going to have:
- An array of different charger inputs, so I can skip all of these silly shenaneggins and just use whatever laptop charger I pick up off the street.
- A built-in AC brick (or a cutout of the bottom of the laptop where it can get velcro-strapped, thus avoiding having to get the whole laptop mains safety tested). The Gecko Edubook did this and I've seen slim chargers in the last few years that take a figure-8 C7/C8 power plug (instead of a fatter 3-pin mickey-mouse IEC C5/C6 )
The day the clock stopped
My laptop froze and then never booted again.
When in doubt: treat it like a car. A car needs fuel, air and ingition for the engine to run. A processor requires power, peripherals and clock.
Power rails all seemed OK. Peripherals (eg graphics card) were all in-built into the processor (or perhaps its southbridge?) anyway. Screen seemed fine. That left the clocks.
I found two oscillators on the board: one near the southbridge and one near the USB 3 chipset. I assumed the former would be a good place to start:

I probed it: no clock signal! After a few more probes and pokings: it suddenly came to life and my laptop miraculously POSTed. What on earth?

Theories:
The latter seems less likely given that the problem has not reoccurred.
LCD backlight flicker
This laptop flickers its backlight at a super-annoyingly low frequency. I can't stand it, whenever I move my eyes I see lots of discrete images scatter across my vision and I miss my mark.
Long story short:
- The screen doesn't set the backlight PWM freq, instead it's told what rate to use over I2C. ie changing the LCD panel to another model does not fix this problem, it's a software problem.
- Said I2C lane is part of the connection between graphics card and screen. This is what EDID (screen resolution) info is sent over.
- Intel publishes full datasheets for their graphics chips that list control registers related to these messages. (thankyou thankyou thankyou!)
- Running intel_reg write 0xc8254 0x02000000 fixes my problem
I have to run this command every time my screen turns on (unless I want to modify the driver sourcecode to fix it permanently). I have bound this command to a button next to the brightness controls on my keyboard to make enabling it convenient. My eyes and brain have really appreciated this fix.
End notes
Performance of this almost decade-old laptop has surprisingly been good. An SSD really helped. VMs of Windows 7 are fine but VMs of Windows 10 are completely molasses (something seems to be wrong/missing with the HW VM acceleration of this processor).
My laptop currently has 16GB of DDR3 installed because I had some spare 8GB DDR3 1.5V sticks from a free broken laptop I harvested for parts years ago -- getting that much in a modern laptop would require a single 16GB DDR4 stick (at least $100AUD on its own). In fact that's more RAM than my desktop has. I really wish modern 11.6" laptops still came with 2x DIMM slots, it really helps lengthen their useful service lives.
Battery life is not amazing, I get 3 to 6 hours depending on the load, I think that's fantastic given the battery is almost a decade old. Youtube videos tear (likely a graphics driver issue) so I watch them in mpv instead for the most part.
Whilst I was reverse engineering the BIOS I may have made a few other changes:

Hints:
- I spotted some "official" tools to brand the BIOSs however I couldn't get them to work, so I did it manually.
- These BIOS seem to support 640×480 GIF87a, GIF89A and JPEG formats.
- Anything less than 640×480 gets resized at runtime (ugly!)
- Search the BIOS for image header strings to find where they go.
- Make sure to clear the full memory region where these images go (was it 32K?) before adding your own, otherwise the leftover data confuses the decoder and you get a garbled splash screen.
This laptop and I have had a monumental journey and we're still fighting strong, just missing a small amount of ablative case armour.
I've been wanting to write this article for a year but have never found the time. As usual: I've given up on "making it perfect" because otherwise I would never publish anything.
I really hope this article inspires other people to attempt repairs that they never thought they could be capable of; it's a shame that so much useful stuff gets thrown out because complex or nefarious systems get in the way of legitimate repair.
Prior similar laptop articles: Snow notes and State of my ARM Chromebook
from Hacker News https://ift.tt/3j2tUDC
No comments:
Post a Comment
Note: Only a member of this blog may post a comment.