A couple of weeks ago, I started working on getting Racket CS to compile and run on iOS and, with a lot of guidance from Matthew Flatt, I managed to get it working (with some caveats). Those changes have now been merged, so I figured I’d write another one of these guides while the information is still fresh in my head.
Compile Racket for macOS and for iOS
You need a recent version of Racket and it’s associated fork of Chez Scheme built for your host machine in order to cross-compile things. To build both of them, clone the Racket repository and follow the build instructions. If you use the default make target, then you’ll end up with a host Racket installation overlayed on top of the racket/ directory in the repository and with a build of Chez Scheme at racket/src/build/cs/c/.
Next, you can cross-compile Racket CS for iOS by making a new build directory within racket/src/ and configuring a cross build by specifying a custom prefix (so that the make install step won’t overwrite the host Racket installation), the target host architecture, a path to the iOS SDK (or the shorthand name “iPhoneOS”) and the paths to the host Racket and Chez Scheme.
|
|
After running the above series of commands, you should end up with a cross-compiled Racket installation at racket-ios/ inside the source repository.
Cross-compile Racket modules for iOS
I added a section on how to cross-compile Racket modules to the “Inside Racket” docs so refer to that. In short, if you save the following module under app.rkt somewhere
|
|
then you can run
|
|
to produce app.zo, a binary object containing the cross-compiled code for that module and all of its dependencies.
Set up your XCode project
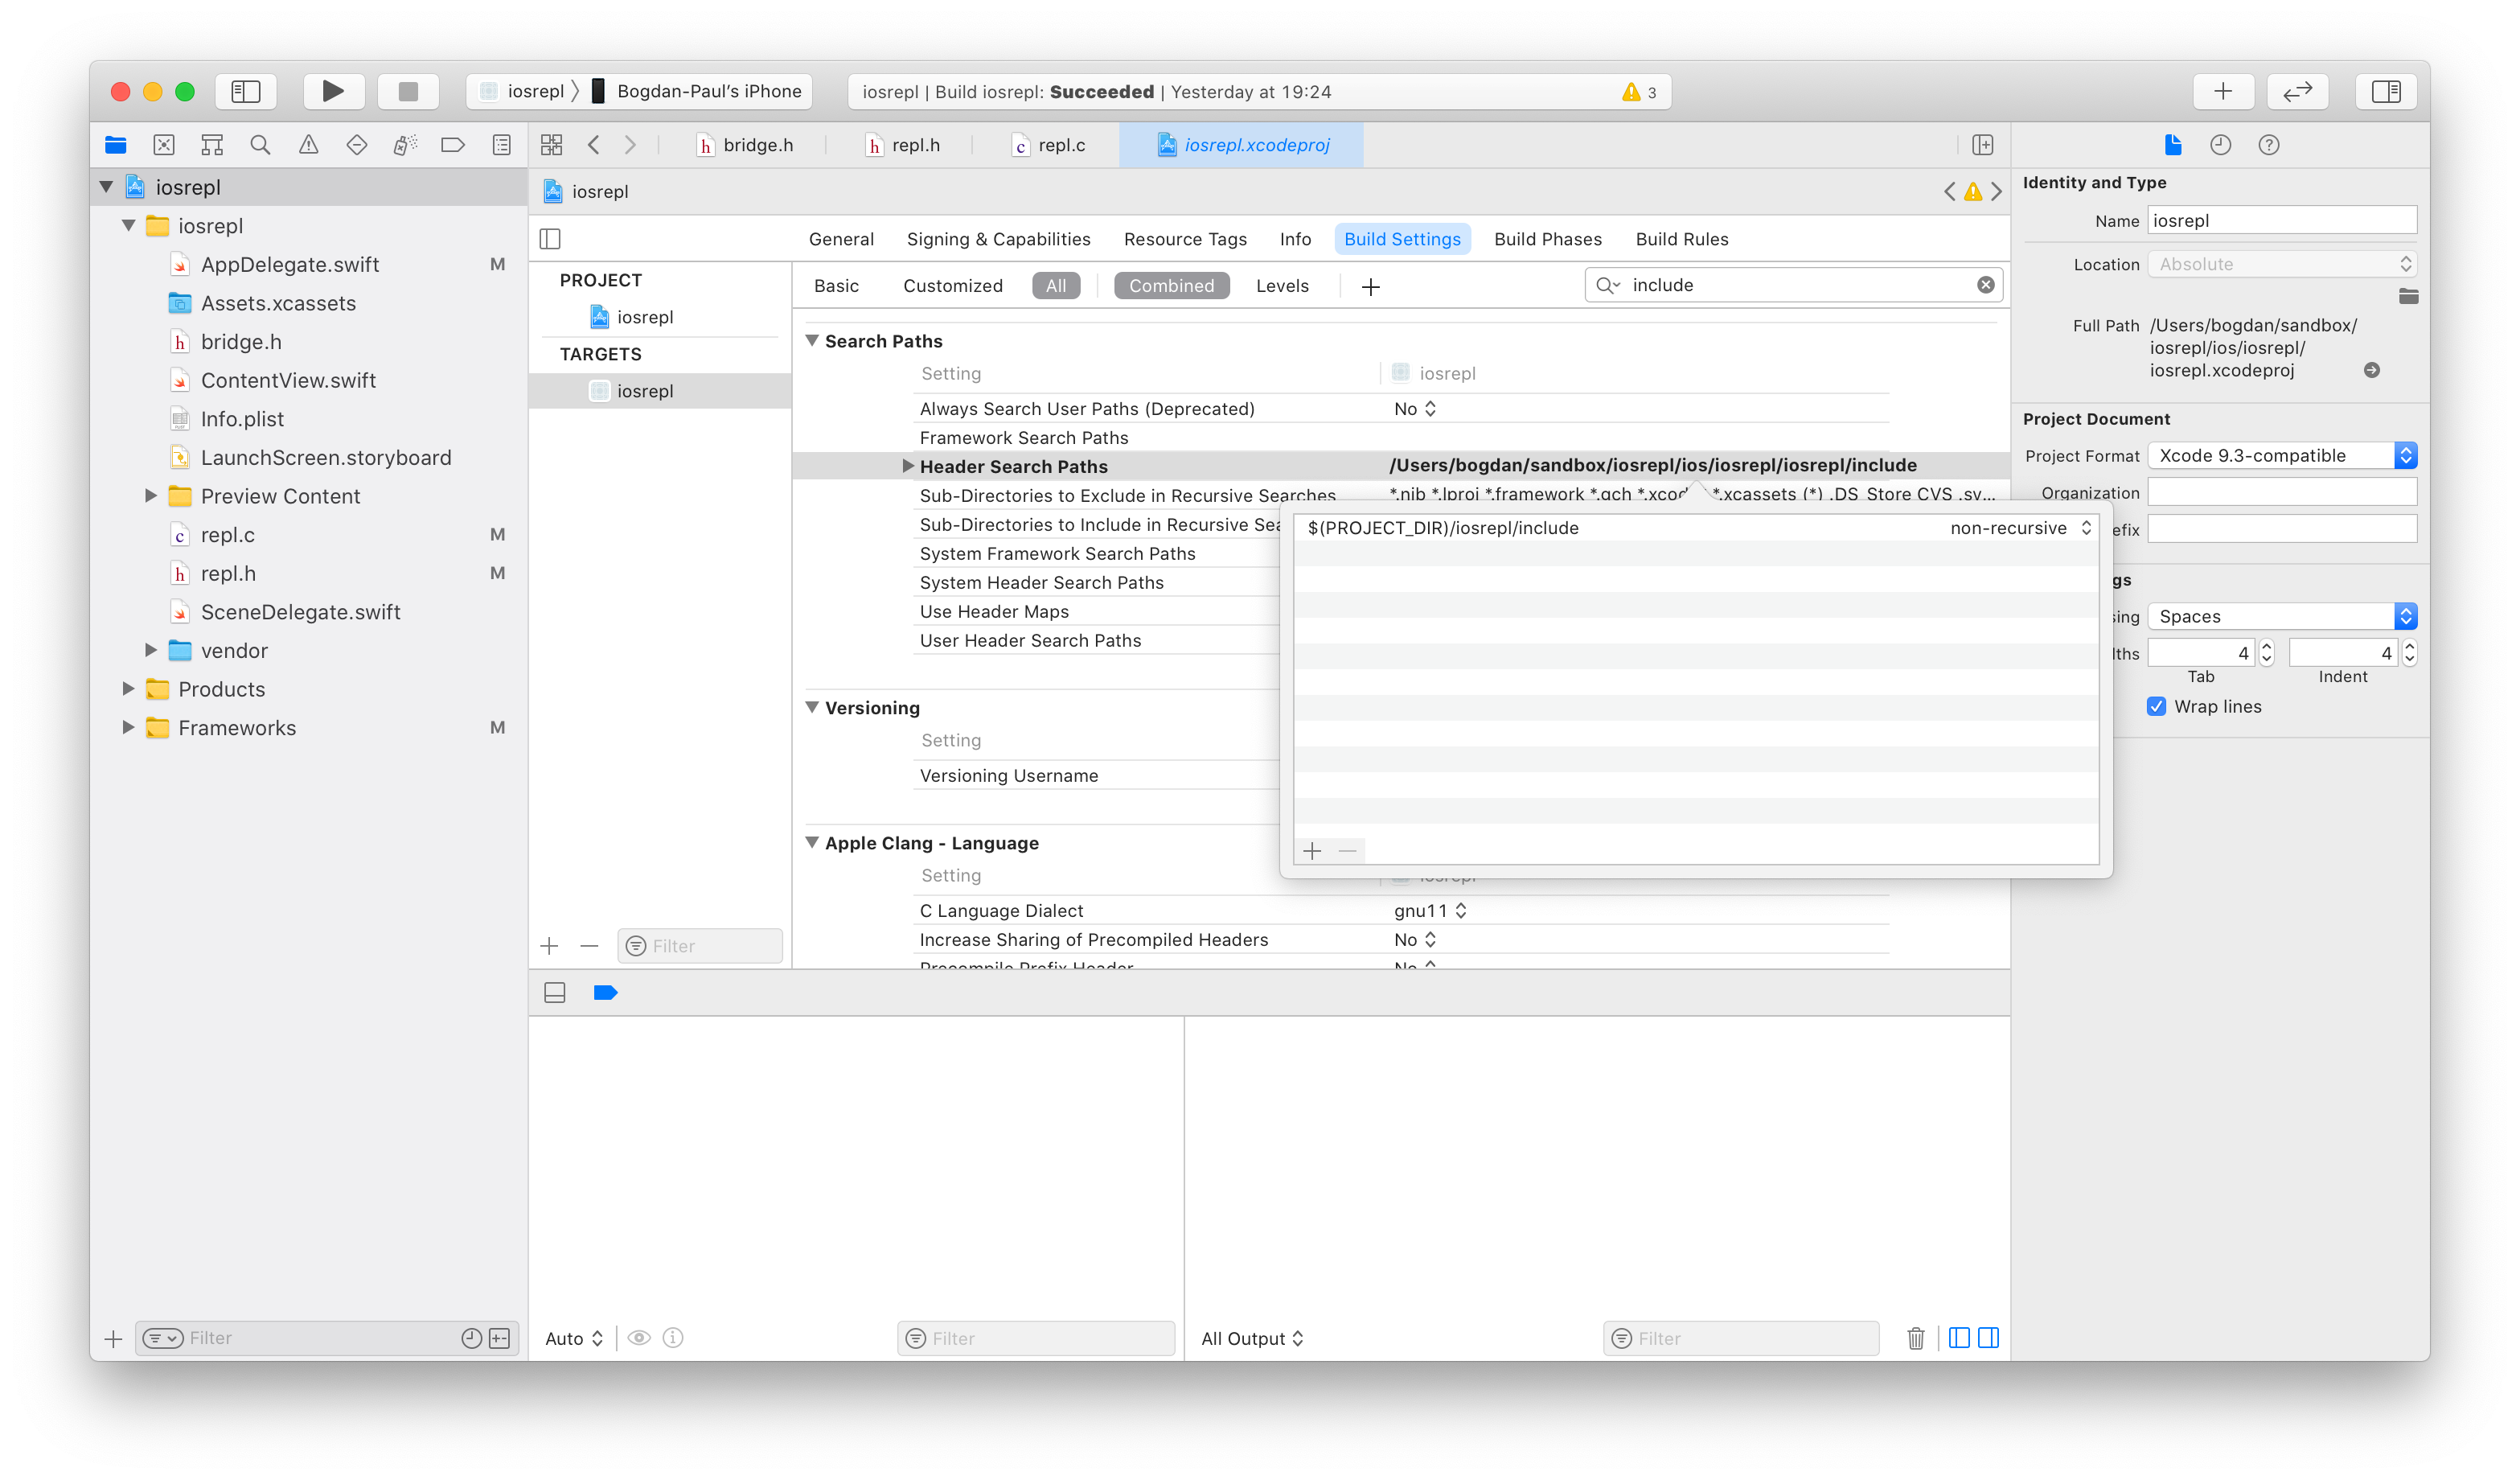
To link against and use Racket CS within an XCode project, copy racketcs.h, racketcsboot.h and chezscheme.h from racket-ios/include/ into a sub-directory of your project, then add that sub-directory to the “Header Search Paths” section under your project’s “Build Settings” tab.
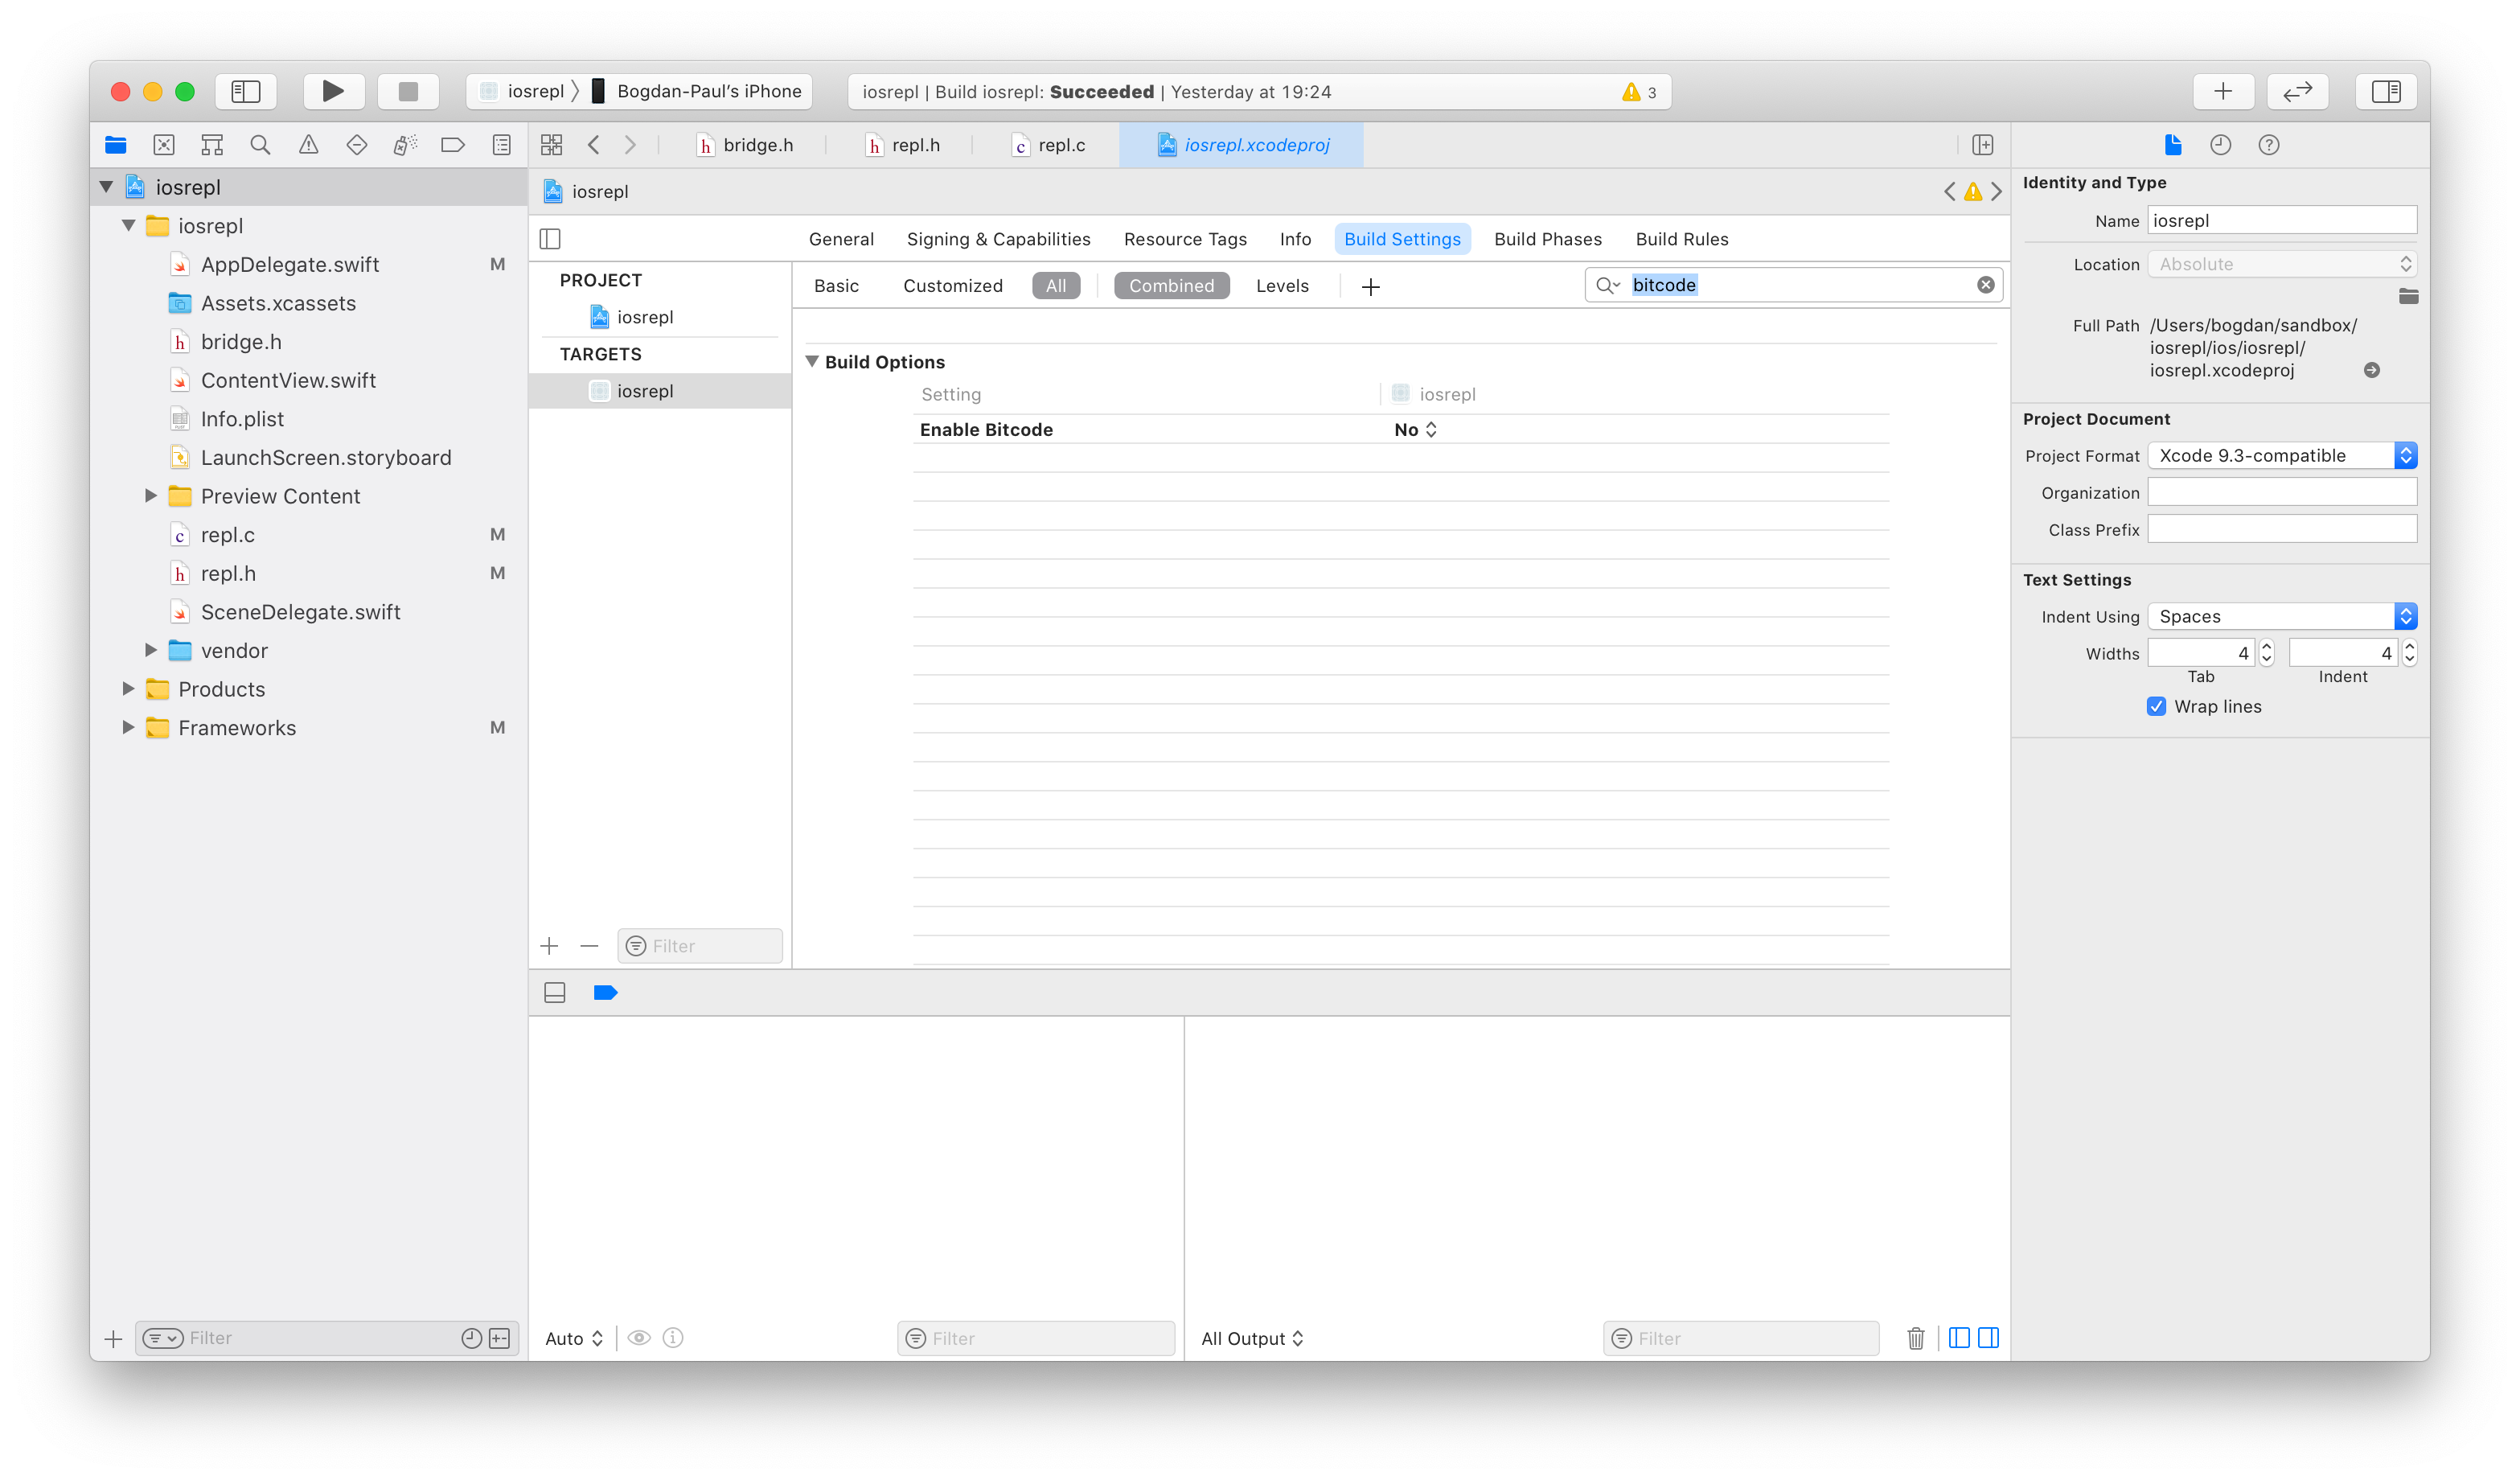
Then, disable Bitcode from the same section.
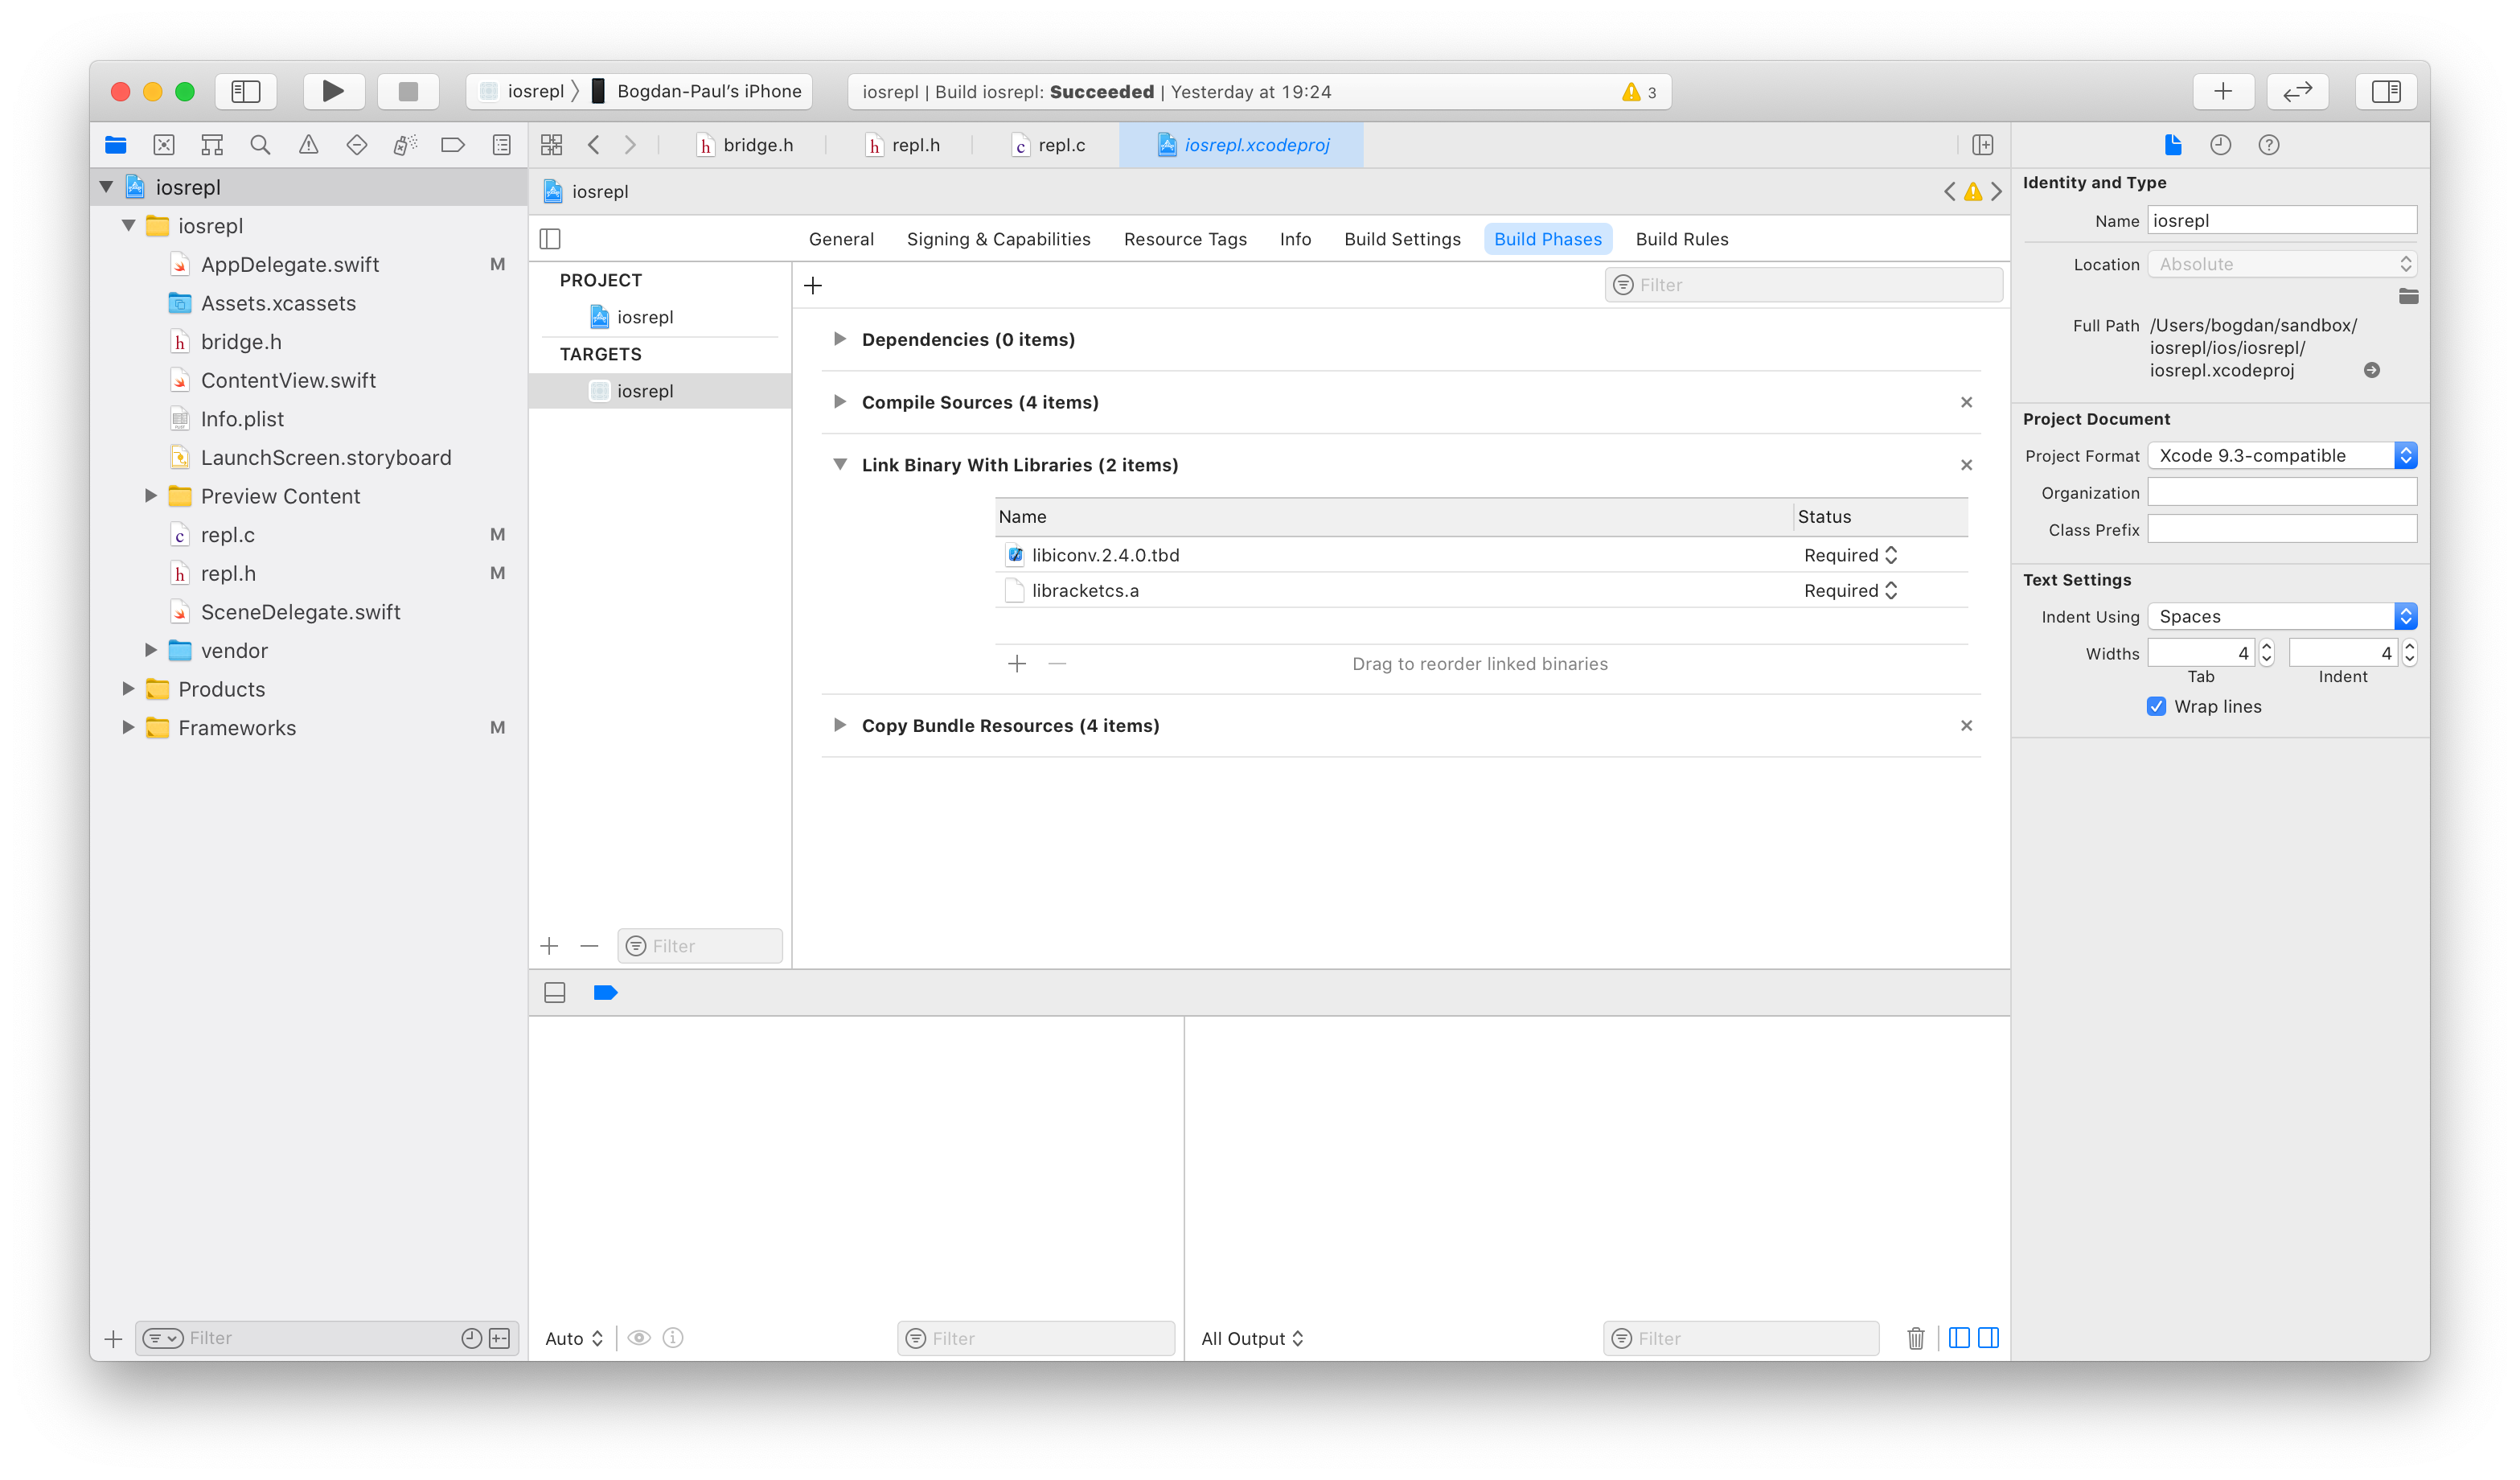
Next, copy libracketcs.a, petite.boot, scheme.boot and racket.boot from racket-ios/lib into a sub-directory of your project called vendor/ and drag-and-drop the vendor/ directory into your XCode project. Then, instruct XCode to link libracketcs.a and libiconv.tbd with your code from the “Build Phases” tab. You’ll have to add libracketcs.a to your project using the “Add Other…” sub-menu.
Next, add a new C source file called vendor.c and answer “yes” if prompted to create a bridging header for Swift. I tend to re-name the bridging header to plain bridge.h because I don’t like the name that XCode generates by default. If you do this, you’ll have to update the “Objective-C Bridging Header” setting in your “Build Settings” tab. From bridge.h, include vendor.h and inside vendor.h add definitions for racket_init and echo
|
|
then, inside of vendor.c, implement them
|
|
Take a look at the Inside Racket CS documentation for details on the embedding interface of Racket CS. The gist of racket_init is that it takes the paths to petite.boot, scheme.boot, racket.boot and app.zo as arguments in order to initialize Racket and then load the app.zo module, which you can do from the AppDelegate’s application(_:didFinishLaunchingWithOptions:) method:
|
|
Upon successful initialization, you should be able to call the Racket echo function from Swift:
|
|
Compile and run the project on a device and you should see “Hello from Racket!” get printed in your debug console.
Some XCode gotchas
If you copy vendor/ into your project instead of creating “folder references” when you drag-and-drop it, then code signing may fail with an ambiguous error.
Avoid using symbolic links for any of your resources (like the stuff in vendor/). Doing so makes copying the code over to the device fail with a “security” error that doesn’t mention the root problem at all.
from Hacker News https://ift.tt/3c0D4gy
No comments:
Post a Comment
Note: Only a member of this blog may post a comment.