On my twitter page (follow me if you haven’t yet!) I’ve been creating a few very quick tutorials to help people understand what NES graphics mean. I see a lot of people doing pixel art and just calling it “8-bit” or “NES style”, but a lot of the time it misses the target by a fair margin. Hopefully these will help clarify why.
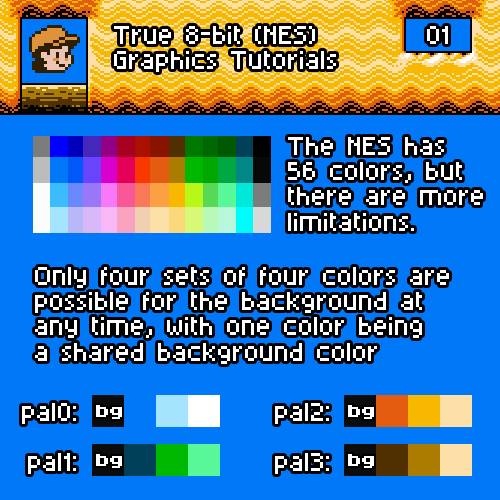
Tutorial 1: Background palette
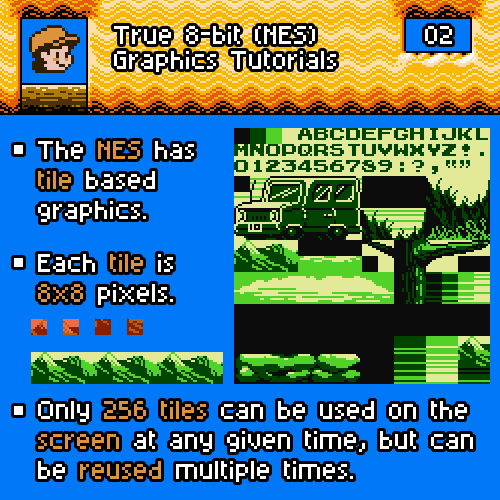
Tutorial 2: Background tiles
Tiles are a big reason why NES games are what they are. If you don’t think with tiles, chances are you won’t get the right feel. Use a tile based pixel editor like PyxelEdit, yy-chr or NES Screen Tool.
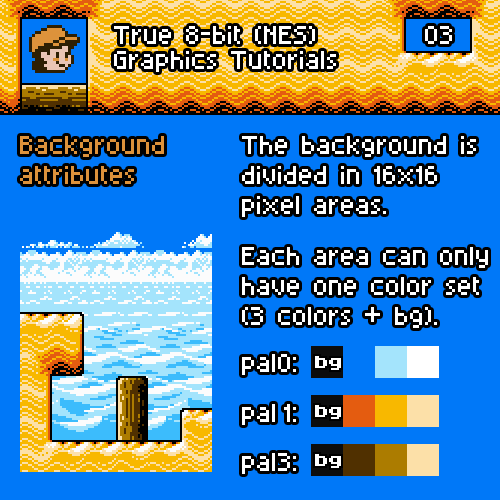
Tutorial 3: Attributes
So the screen is 256×240 and is made of tiles, and there are four sub palettes of 3 colors each, +1 background color. And this is how all of it comes together. I used black for the bg here.
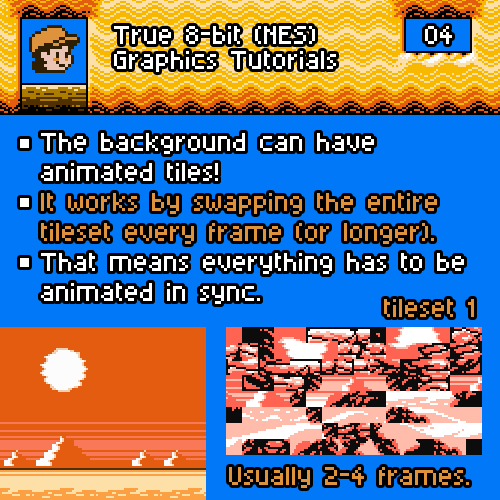
Tutorial 4: Animated tiles!
The NES has no problem changing the entire tiles table every frame. There’s technically no limit to this other than cost of hardware memory inside the cartridge. Go wild.
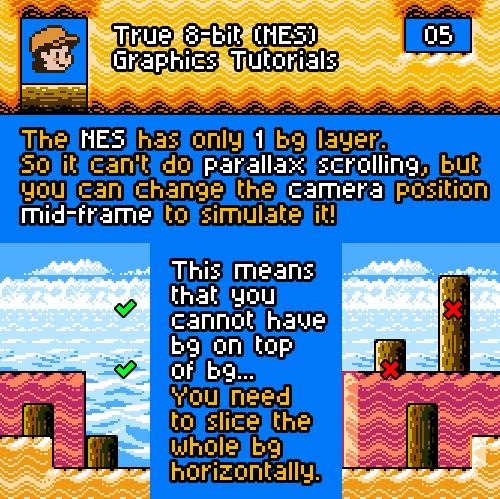
Tutorial 5: Parallax
This one is all about that sweet parallax effect. If you want the true NES feel this is important! There are techniques to fake bg layering, but they are very technical and limited. This is the real deal.
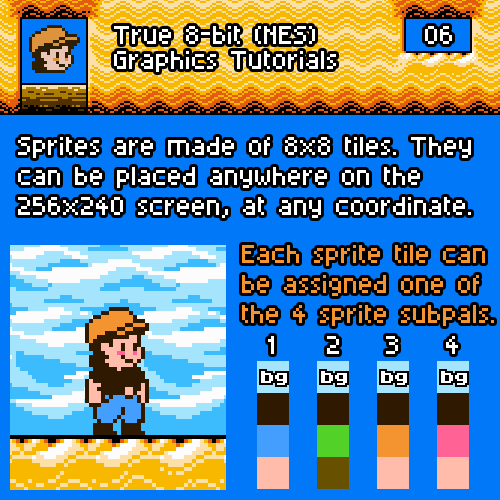
Tutorial 6: Introduction to sprites
Sprites are a very extensive topic. There are 8×8 and 8×16 modes, flickering, flipping, clipping… Phew! Keep in mind that ALL sprites in the screen will have to use one of the 4 subpals you choose!
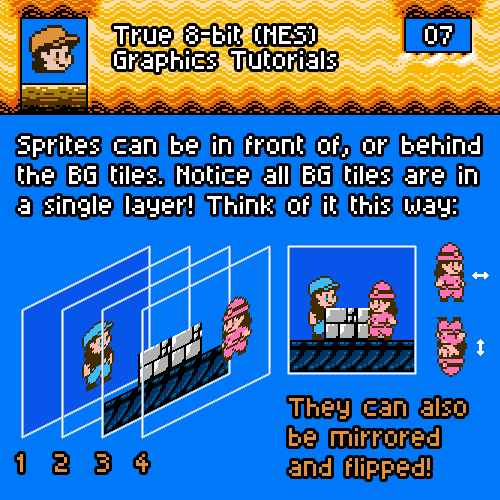
Tutorial 7: Sprite manipulation
Sprites have the advantage of not being aligned to a grid like the background tiles, so you can position them at any coordinate on the screen. But they have a few extra features!
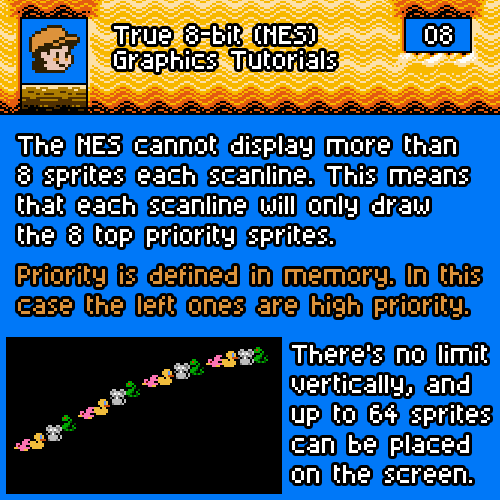
Tutorial 8: Scanline limit
Let’s get technical. The NES can display up to 64 sprites on the screen, but only 8 can appear on each scanline! Some games will change sprite priority every frame so more can be seen, resulting in sprite flickering.
Tutorial 9: 8×16 Sprite Mode
There isn’t a “best” sprite mode, but I feel like 8×16 is often overlooked. Here you can see one of the biggest reasons to use it. The 8 sprites/scanline limit has been respected in this example.
Same as a with the 8×8 sprite, a whole 8×16 sprite can have only 1 subpal. Also, since the sprite is twice as tall in this mode there will be a higher tendency for scanline sprite limit to occur. So either embrace flickering or design the game very well so it doesn’t happen often!

from Hacker News https://ift.tt/2O5kYy7
No comments:
Post a Comment
Note: Only a member of this blog may post a comment.